
This support article will show you how to create a view of a selection of communities in SWOOP for Viva Engage.
This view will allow you to see data for the communities you care about, without the data being impacted by communities throughout the rest of the organisation.
For example, you may share a tenant with other businesses under the same umbrella, but you don't wish to see their community data.
Creating a view of communities
Tip: You can export a list of 'all communities' in the Admin settings if you need reminding of which communities to add.
- Go to the 'Communities' dashboard down the left hand side of SWOOP.
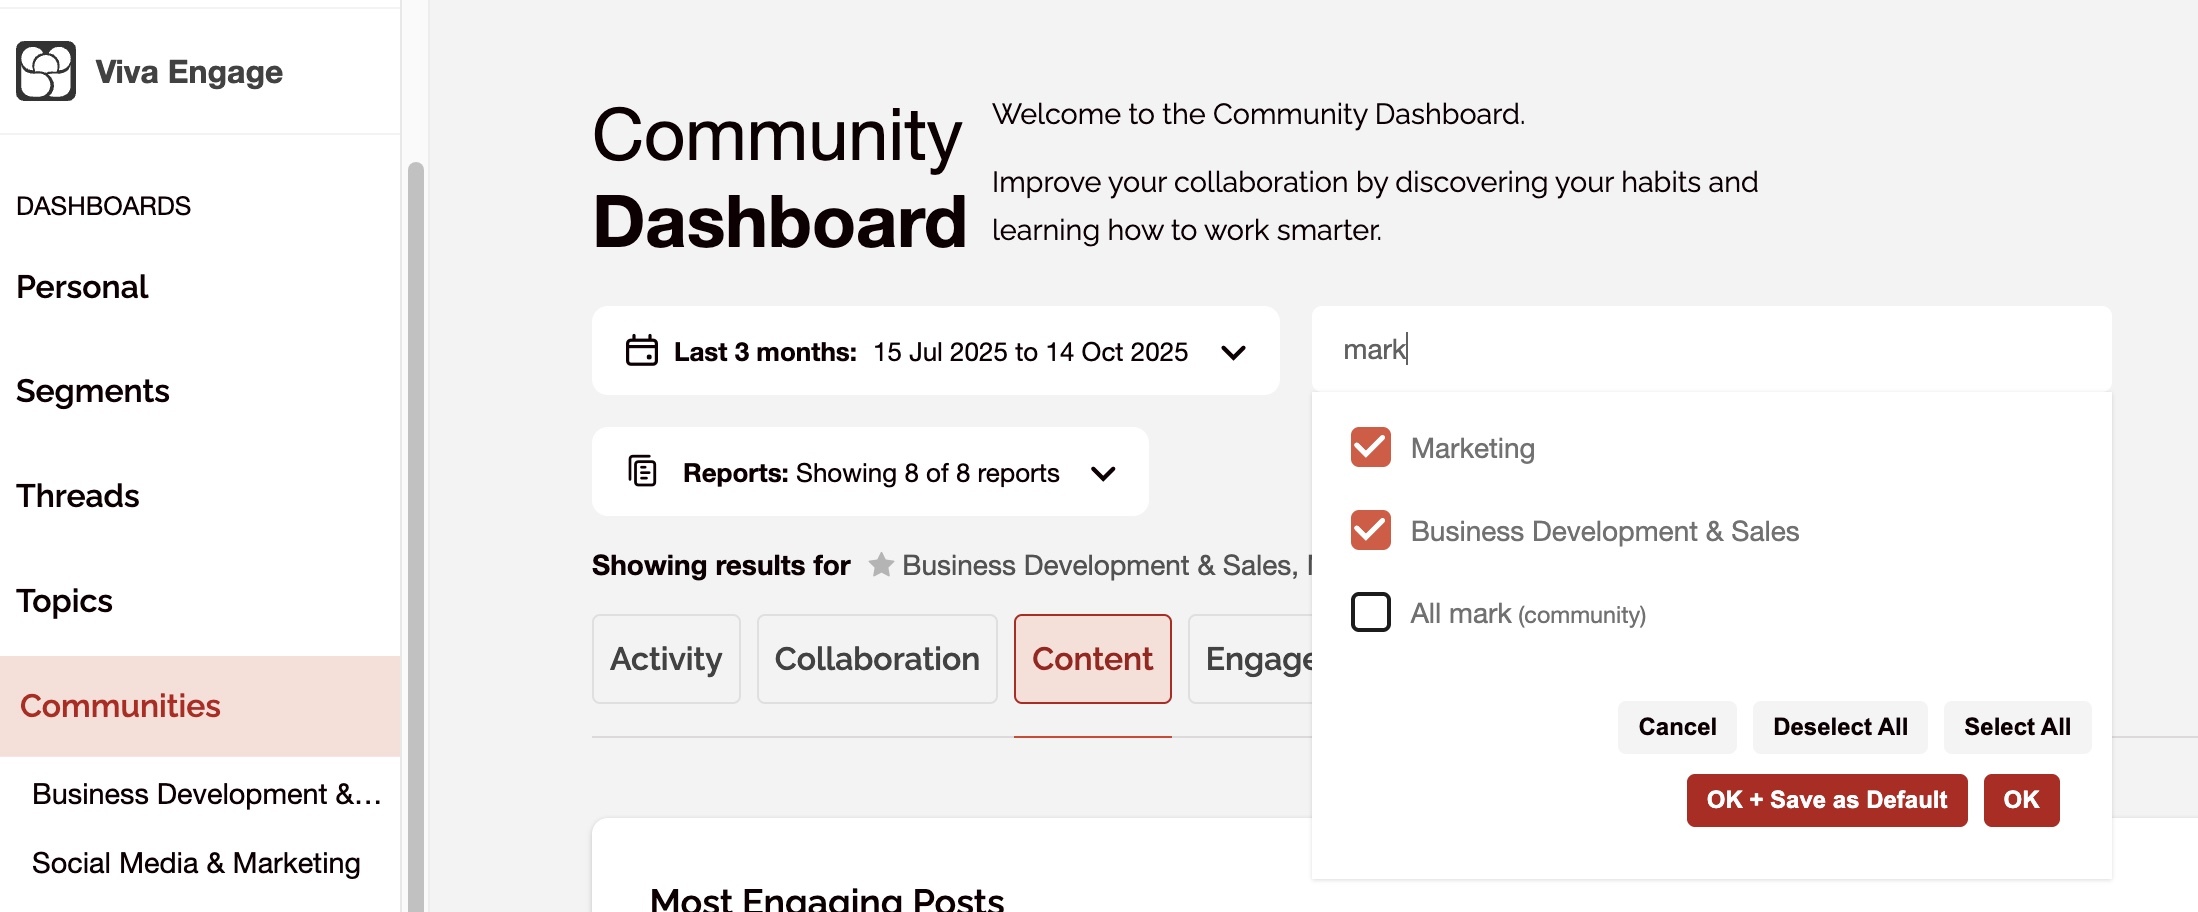
- Use the search bar to start typing in the name of the community you want to include.
Select the box next to the community name. Don't click 'ok' or 'save' yet if you want to add more communities to the list.
- Search for the next community and select the box next to the name.
- Repeat this until you have gone through and ticked every community name that you want to add to this view then click 'ok'.
- Below the search bar, you will now see a grey star icon with the names of all of the communities you have selected listed next to it.
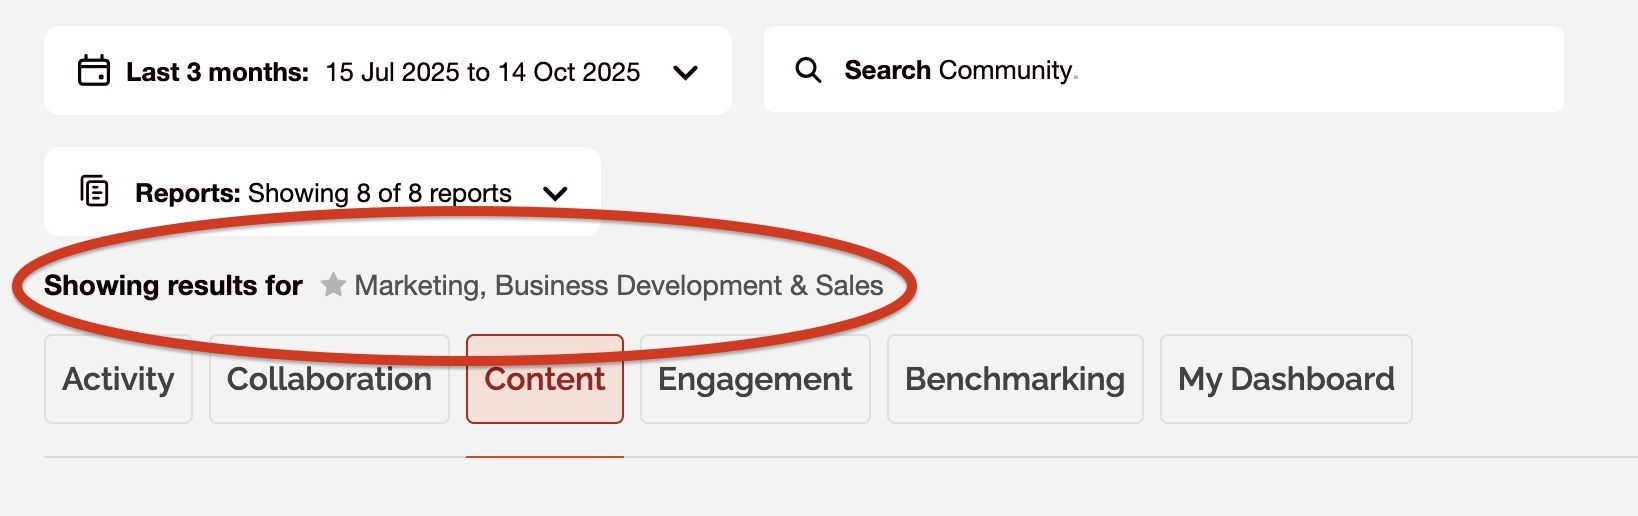
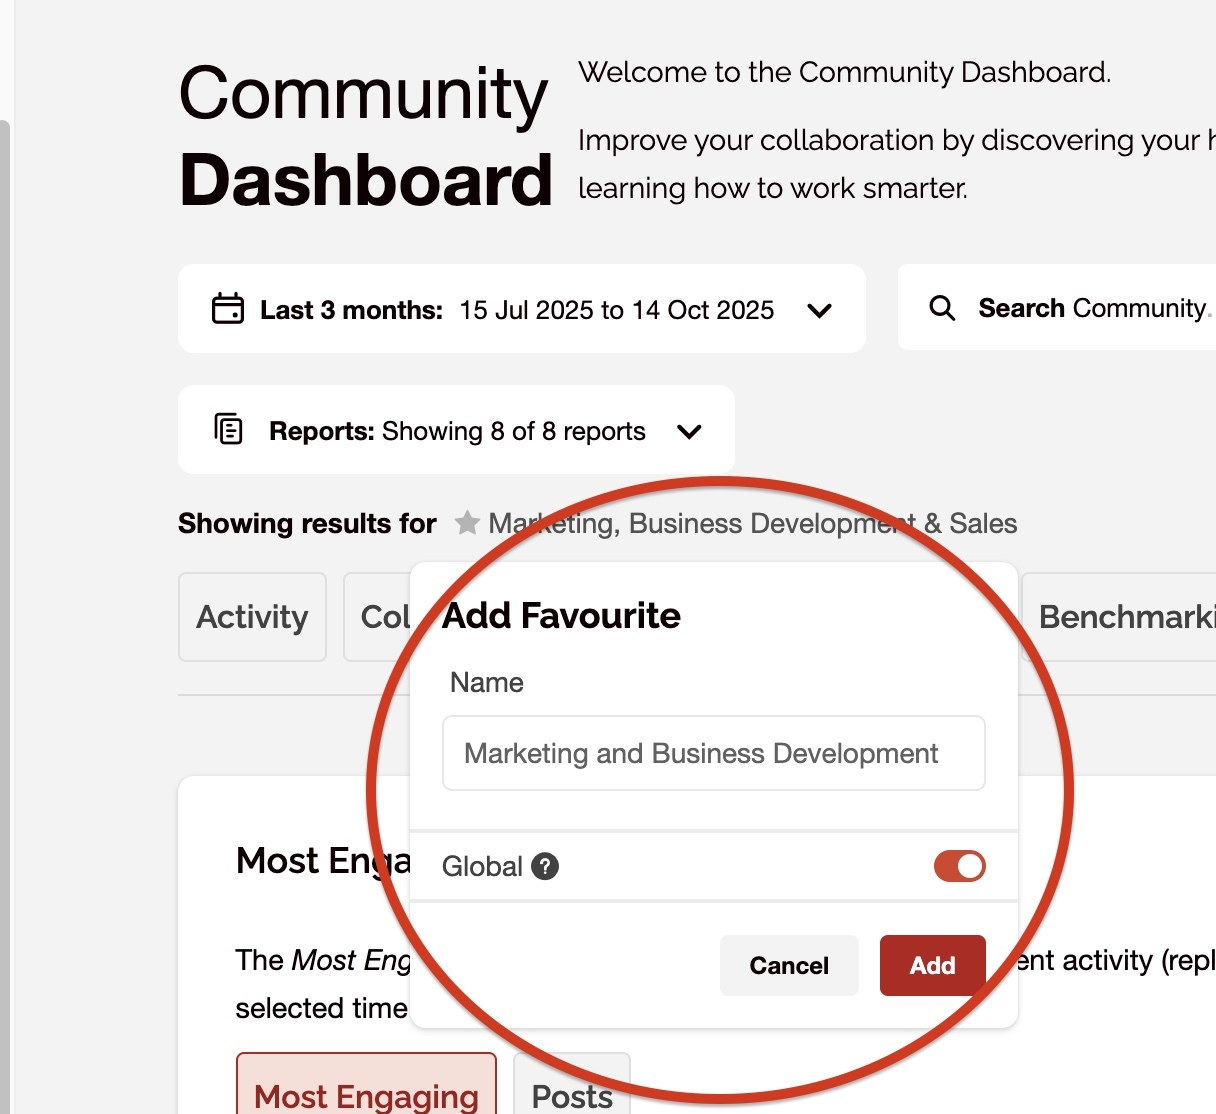
- Click on the grey star, as this will allow you to save this view as a 'favourite' which means you can go back to it later without selecting all of the communities again.
- Give the favourite a name.
- Toggle the 'Global' switch to 'on' if you would like other SWOOP users to also see this view in their instance of SWOOP. Click 'Add'.
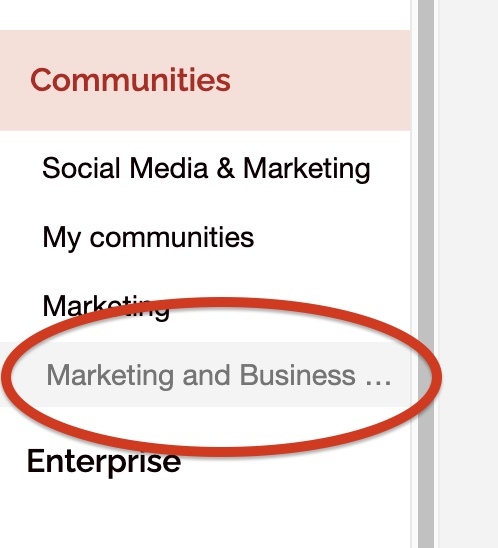
- You will now see your saved view listed underneath the 'Communities' dashboard in the left hand side of SWOOP.
Disable the 'Enterprise' dashboard
If you don't want to be distracted by all other communities that you're not interested in seeing data for, you can choose to disable or limit the Enterprise dashboard in the admin settings.
Note: You will need to be a SWOOP admin to complete these steps, or ask a SWOOP admin to do this on your behalf.
- Click on 'Admin settings' in the bottom left hand corner of SWOOP.
- Go to the 'Dashboard' tab across the top.
- Scroll down the the 'Dashboard visibility settings' and choose a setting next to Enterprise (not visible, admin or advanced user).
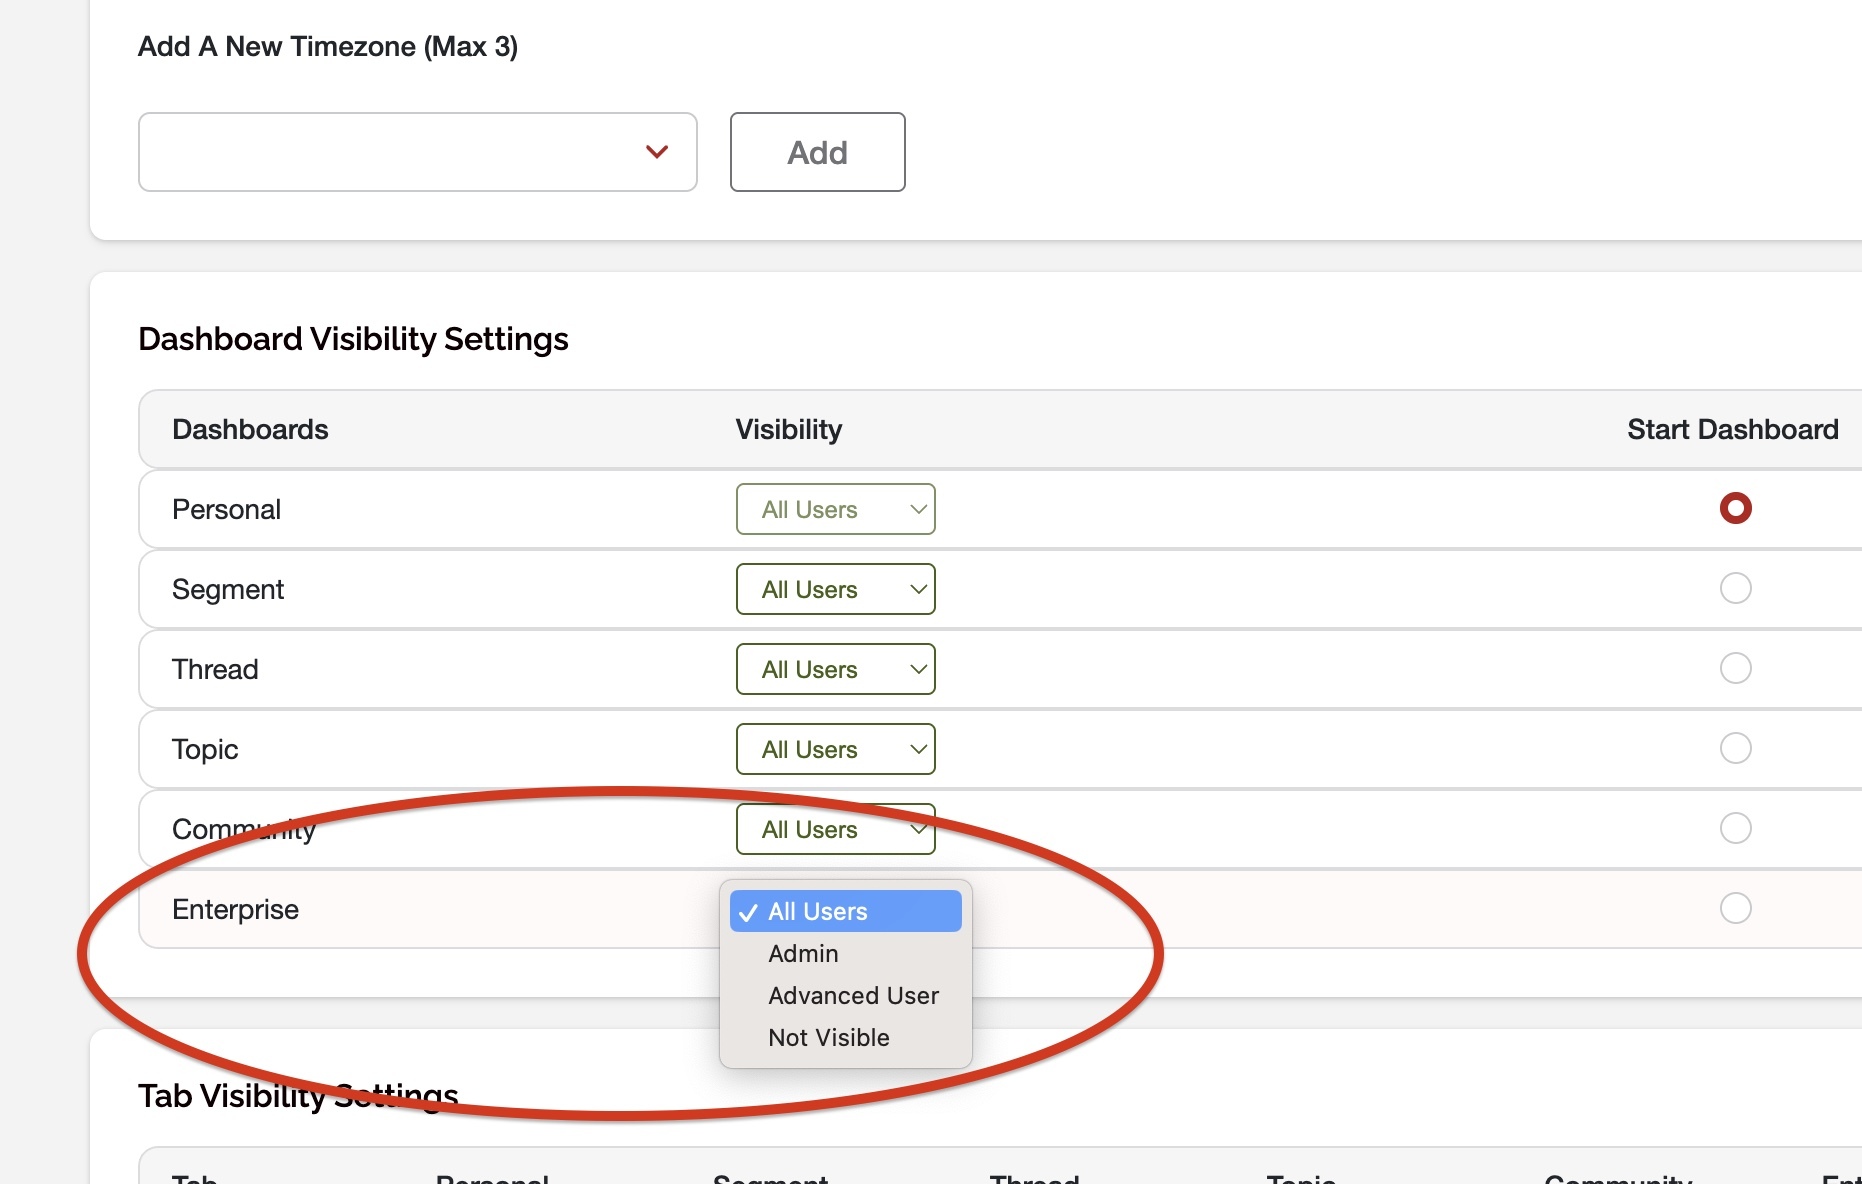
- Click 'Apply changes' in the top right hand corner.
So now instead of viewing data across the whole of the organisation, which will include all communities in your tenant, you will go to your saved view instead to look at amalgamated data across your selected communities.
Editing your favourited views
If you want to add or remove a community from one of your favourited views, you need to:
- Click on your name in the bottom left hand corner of SWOOP and in the pop-up menu, click 'Favourites'.
- You will then find the favourite you want to edit in the list and click on 'edit'.
Here, you will be able to rename the favourite and choose to add or remove communities.
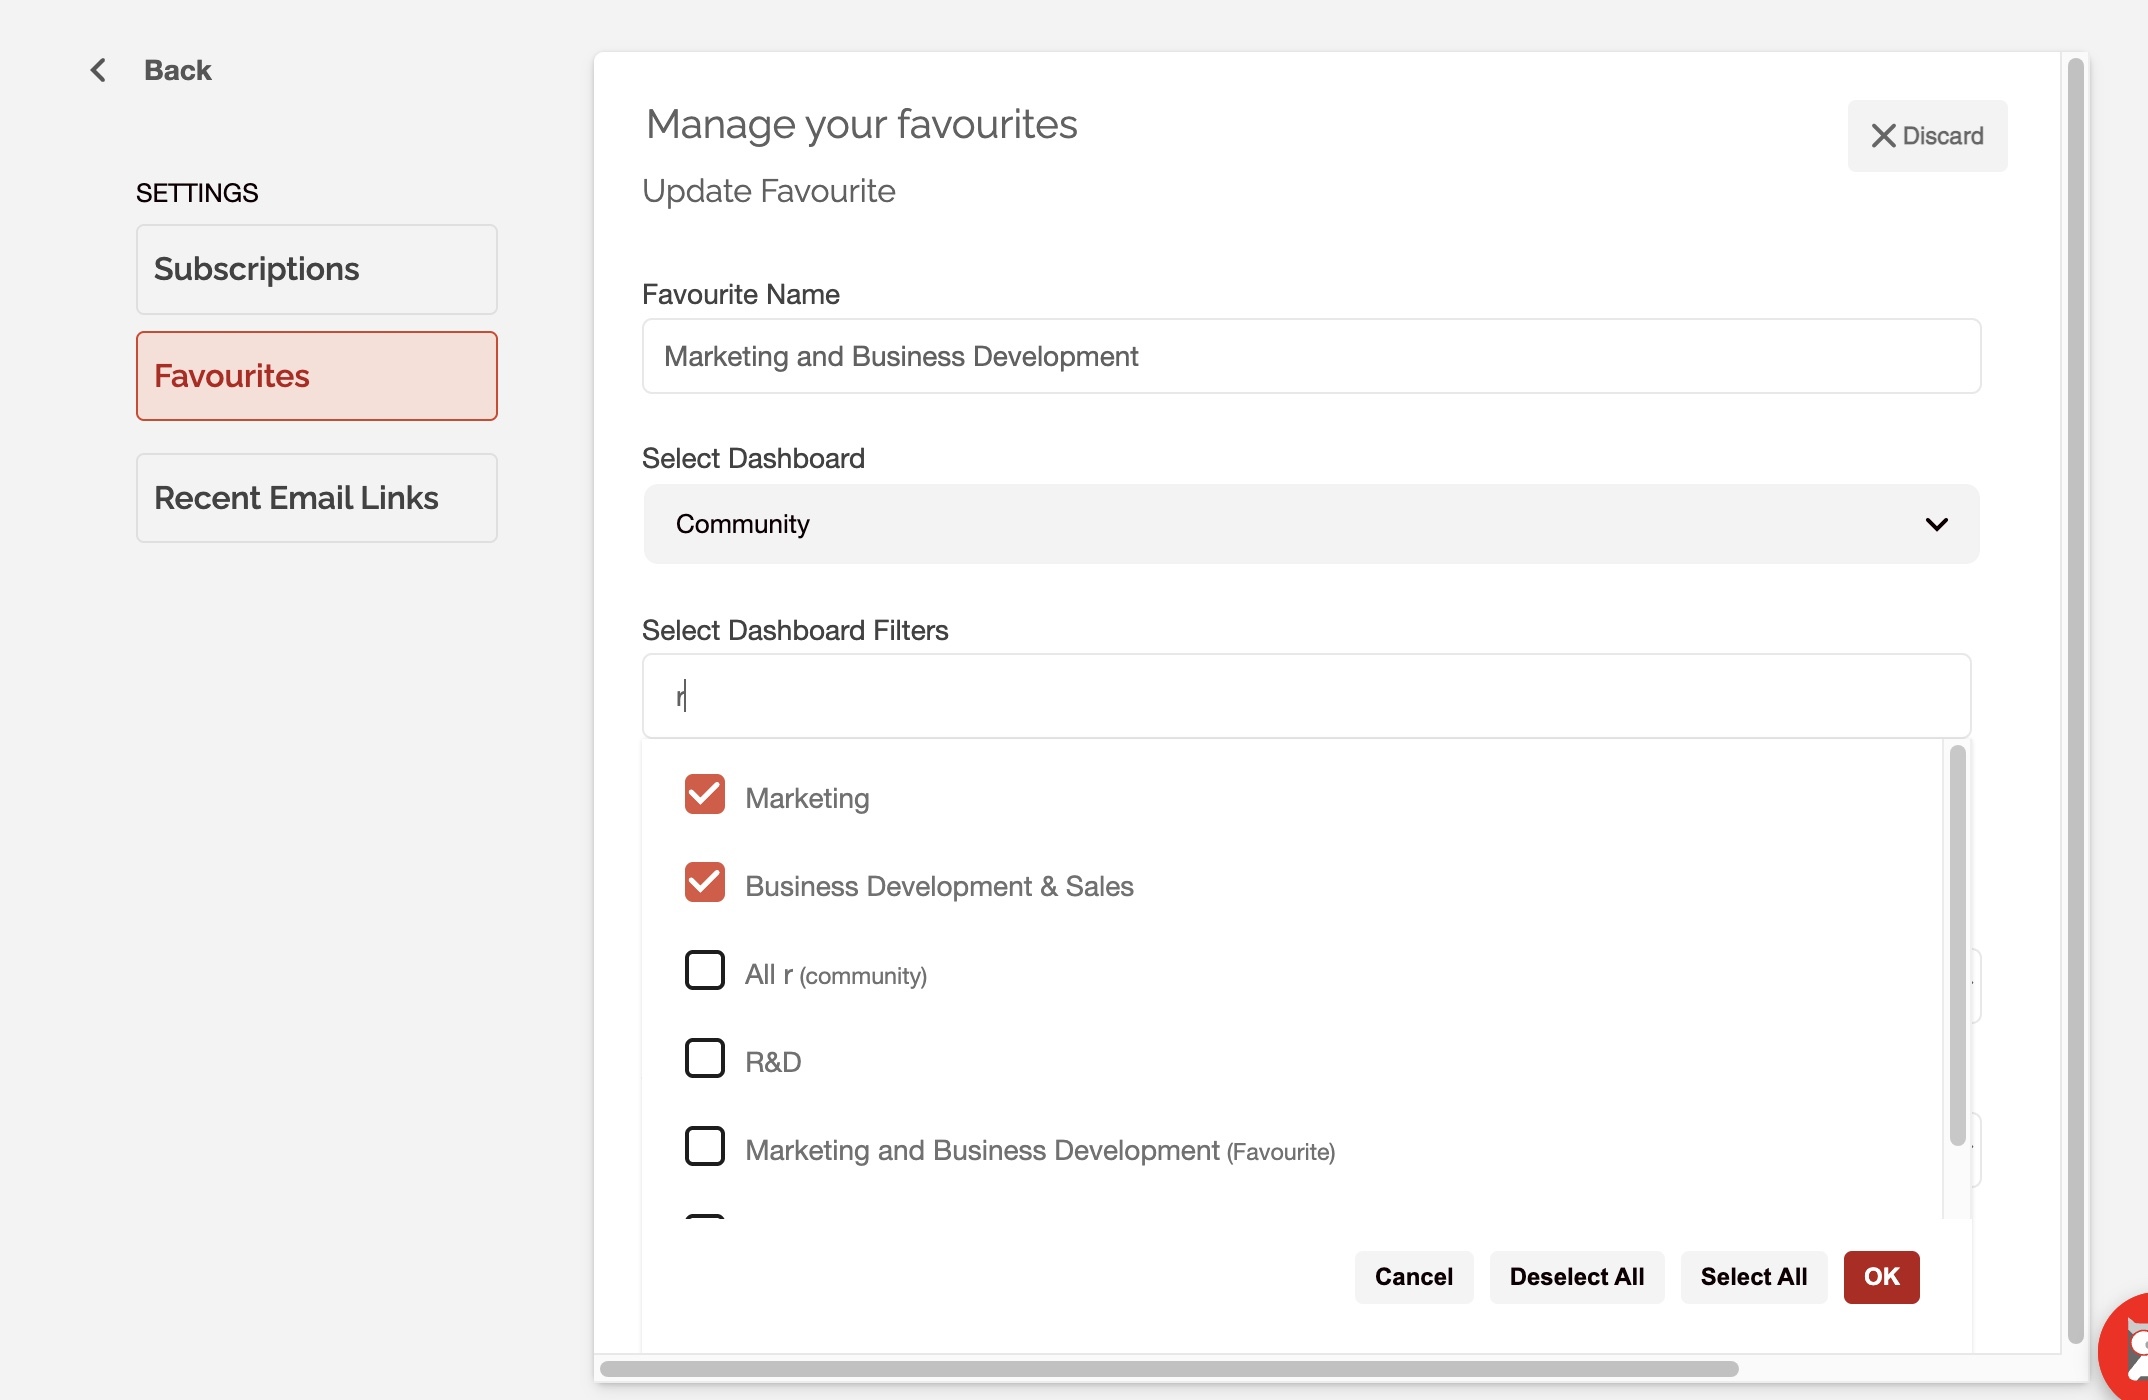
- Remember to click 'ok' when you're done.
Limitations
- If you choose to disable the Enterprise dashboard altogether, you will no longer have access to the 'Enterprise Benchmarking Report', where you can see the performance of your Viva Engage across the whole company against industry averages. If you'd like access to this report, we recommend limiting the dashboard to some users, rather than removing visibility completely.
- The data across the 'Segments', 'Threads' and 'Topics' dashboards will still show data across the whole of the organisation and can't be limited at present. We have an upcoming roadmap item to look in to making community selection a robust feature in SWOOP.